|
Check out the new audio content!
Getting your Trinity Audio player ready...
|
Use Inertial Bounce
By using the inertial bounce expression, you create a natural overshoot effect without additional keyframes.

Overshoot is part of follow through and overlapping action, one of the 12 principles of animation as established by Walt Disney Studios. It describes parts of i.e. a body not moving all at once and coming to a complete stop at their final spot, but moving in succession with “the correct feeling of weight” and shooting past their final destination. “As one part arrives at the stopping point, other may still be in movement […] Then a few frames later, the rest of the parts would settle into their final position.” – The Illusion of Life, Thomas & Johnson (1995, p. 59-60)
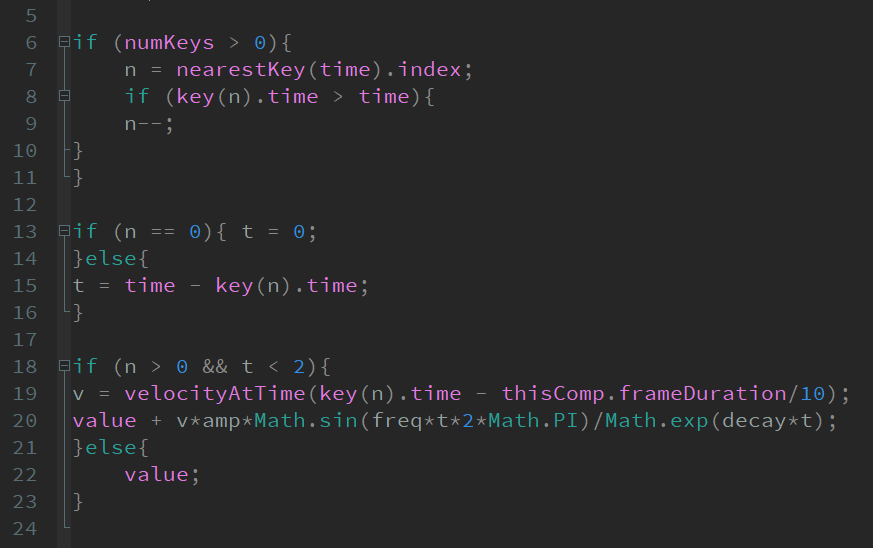
The inertial bounce expression immitates this overshoot effect and can be customised to be more or less intense, long or fade out sooner or later. It has to be applied to properties with keyframes and in the example of a moving character, to each body-part.
amp = .05;
freq = 2.0;
decay = 6.0;
n = 0;

if (numKeys > 0){
    n = nearestKey(time).index;
    if (key(n).time > time){
        n--;
    }
}

if (n == 0){
    t = 0;
} else {
    t = time - key(n).time;
}

if (n > 0){
    v = velocityAtTime(key(n).time - thisComp.frameDuration/10);
    if (t < 2) {
        value + v*amp*Math.sin(freq*t*2*Math.PI)/Math.exp(decay*t)
    } else {
        value;
    }
} else {
    value;
}
I mostly use the inertial bounce expression on pop-up signs in my animation. By using inertial bounce on a scale property, animated from 0% to 100%, you can add a lively pop-up quality to your scale animation. ALT+click the property stopwatch and paste the inertial bounce expression.

Adjust Values
By adjusting the amplitude, frequency and decay values, you can quickly change the force, amount and duration of the pop-up bounce.

Amplitude defines how much past the second keyframe, the layer will overshoot. The lower the amplitude value, the less intense the overshoot. Frequency defines how often the bounce occurs, before settling on the last keyframe. The higher the frequency value to faster it settles. Decay defines friction, a higher value means the bounce will become smaller faster and vice versa.
amp = amplitude
freq = frequency
decay = friction or mass setting
Link to Sliders
By linking expression values to slider controls, you can easily change and adjust the values, even across multiple layers. To change the values of your expression, you won’t have to access the expressions window but can use the slider controls to change the values, even across multiple layers linked to the same slider.

Open Effects & Presets menu and add a slider control to your layer by double clicking the effect, while your layer is highlighted or by dragging the effect to your layer. Highlight an existing value in the expression or position the indicator after the equals sign of a variable and click & drag the pickwhip (swirl icon) to the slider control property. Make sure the slider control is twirled open, in order to access the slider property.
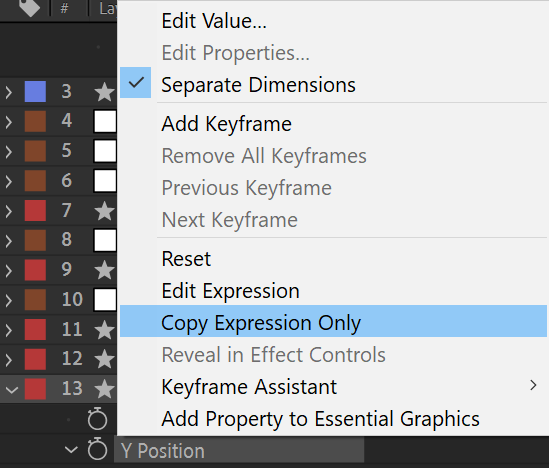
Slider controls allow you to adjust expression values on any number of layers linked to the same slider. Right click the property with the expression and choose Copy Expression Only, paste to another layer. Expressions stay linked to the layer and slider control they were linked to. Copy/pasting a property will retain this link, even after renaming the layer holding the slider control.
Want to Master Motion Design?
Join my Motion Graphics Template Course. Enrol Today and receive a 14-day free trial!
Learn new and advanced expressions and create responsive, modular templates. Personalise branded graphics for your YouTube or talking heads video.

Speak soon,
Sonja
